A Step-by-Step Guide to Commercial Tank Removal

Commercial tank removal is a complex and crucial task for many businesses, particularly those that deal with hazardous materials or have outdated storage systems. Whether you’re decommissioning an old fuel tank, a chemical storage tank, or any other type of commercial tank, understanding the detailed process and best practices can ensure a smooth and safe operation. This guide provides a comprehensive step-by-step overview of the commercial tank removal and decommissioning process.
Commercial Tank Removal
Before diving into the specifics, it’s essential to grasp the basics of commercial tank removal. This process involves safely removing tanks from a commercial site, which can include underground storage tanks (USTs), above-ground storage tanks (ASTs), or specialized tanks used in various industries. The removal process typically requires careful planning, compliance with regulations, and proper handling of any residual materials.
Step-by-Step Commercial Tank Removal Procedures
Step 1: Assess and Plan
The first step in commercial tank removal is to conduct a thorough assessment of the tank and its surroundings. This involves:
- Inspection: Examine the tank’s condition, contents, and any potential hazards. This helps determine the appropriate removal method and necessary safety precautions.
- Documentation: Gather all relevant information, including the tank’s history, material safety data sheets (MSDS), and any permits or regulations that apply.
- Planning: Develop a detailed removal plan that outlines the procedures, safety measures, and disposal methods. Ensure that the plan complies with local, state, and federal regulations.
Step 2: Notify Authorities
Before proceeding with the removal, it’s crucial to notify the appropriate regulatory authorities. This step ensures that you comply with legal requirements and avoid potential fines or legal issues. Depending on your location, you may need to notify environmental agencies, fire departments, or other relevant bodies.
Step 3: Prepare the Site
Preparing the site involves several key tasks to ensure a safe and efficient removal process:
- Safety Measures: Set up safety barriers and signage to keep unauthorized personnel away from the work area.
- Utility Disconnections: If the tank is connected to utilities, such as fuel lines or electrical systems, disconnect them properly to prevent accidents.
- Environmental Controls: Implement measures to control spills or leaks, such as placing absorbent materials around the tank.
Step 4: Drain and Clean the Tank
Draining and cleaning the tank is a critical step to ensure safety and prevent contamination:
- Empty the Tank: Carefully pump out any remaining contents, including liquids and solids. This step must be done following proper hazardous material handling procedures.
- Clean the Tank: Thoroughly clean the interior of the tank to remove any residues. This may involve washing, scrubbing, or other cleaning methods, depending on the tank’s contents and condition.
Step 5: Remove the Tank
Once the tank is emptied and cleaned, you can proceed with the physical removal:
- Above-Ground Tanks: For tanks located above ground, the removal process typically involves dismantling the tank and its associated infrastructure. Use appropriate tools and equipment to cut, lift, and transport the tank.
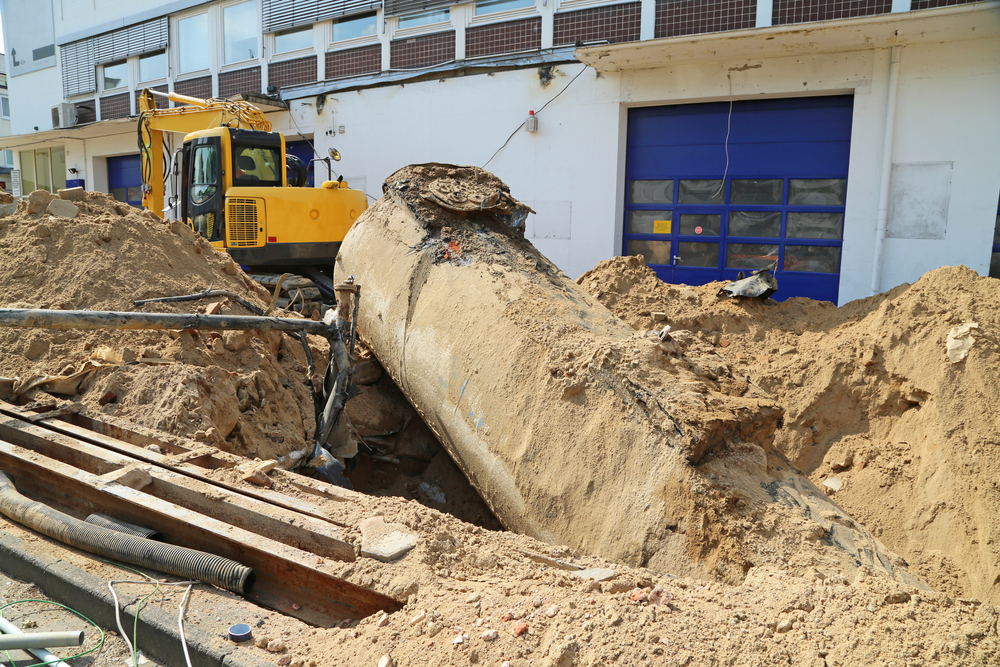
- Underground Tanks: For underground tanks, excavation is required. Carefully dig around the tank to expose it fully, then lift it out of the ground. Ensure that the excavation site is properly supported to prevent collapses.
Step 6: Dispose of the Tank
Proper disposal of the tank is essential to ensure environmental safety and regulatory compliance:
- Recycling: If the tank is made of recyclable materials, such as metal, consider recycling it. Ensure that the recycling facility is certified to handle such materials.
- Waste Management: For tanks that cannot be recycled, arrange for proper disposal through a licensed waste management company. They will ensure that the tank is disposed of in accordance with all relevant regulations.
Step 7: Site Remediation and Restoration
After the tank has been removed, you must address any potential environmental impacts and restore the site:
- Site Assessment: Conduct a post-removal assessment to check for any contamination or damage caused by the tank. This may involve soil testing and other environmental evaluations.
- Cleanup: If contamination is detected, perform necessary cleanup and remediation procedures to address any environmental hazards.
- Restoration: Restore the site to its original condition or as required by regulations. This may include backfilling excavated areas, regrading the site, and repairing any infrastructure affected by the removal process.
Best Practices for Commercial Tank Removal
To ensure a successful tank removal project, adhere to the following best practices:
- Hire Professionals: Engage experienced professionals who specialize in commercial tank removal. They will have the expertise and equipment needed to handle complex tasks safely and efficiently.
- Follow Regulations: Strictly adhere to all local, state, and federal regulations governing tank removal and disposal. Non-compliance can lead to significant fines and legal issues.
- Prioritize Safety: Implement comprehensive safety measures throughout the removal process to protect workers, the environment, and the surrounding community.
- Document Everything: Keep detailed records of the removal process, including inspection reports, permits, and disposal receipts. This documentation is essential for regulatory compliance and future reference.
Conclusion
Commercial tank removal is a detailed and regulated process that requires careful planning and execution. By following the step-by-step procedures outlined in this guide and adhering to best practices, you can ensure a safe and compliant removal operation. Whether you’re dealing with an above-ground or underground tank, the key to success lies in thorough preparation, professional execution, and meticulous attention to regulatory requirements.


